Open OnDemand Web Portal
Open OnDemand is a web portal that provides access to CHPC file systems and clusters. It allows to view, edit, and upload and download files, create, edit, submit and monitor jobs, run GUI applications, and connect via SSH, all via a web browser and with a minimal knowledge of Linux and scheduler commands.
The Ohio Supercomputer Center, which develops Open OnDemand, has a detailed documentation page on all the features, most of which are functional at CHPC as well.
On this page
The table of contents requires JavaScript to load.
Connecting to Open OnDemand
To get started, go to https://ondemand.chpc.utah.edu and log in with your CHPC username and password.
Other Login Portals
- For classes, use https://ondemand-class.chpc.utah.edu
-
For the Protected Environment, use https://pe-ondemand.chpc.utah.edu
You can use ondemand and ondemand-class interchangeably - if one is too busy (causing the page to lag), you can try the other OnDemand link. This does not include pe-ondemand (that is OnDemand access to the Protected Environment).
After this, a front page is shown with a top menu like this:
This menu provides access to the OnDemand tools
File Management and Transfer
The Files menu provides easy access to your personal files on CHPC's storage systems, including your home directory, group spaces, and scratch file systems.
You can also use this menu to quickly transfer files between your personal computer and CHPC. For example, to upload a file to your Home Directory, simply click on the Files menu, select Home Directory, and then click the blue Upload button. A window will pop up, allowing you to browse and select files from your computer.
OSC's File Transfer and Management help page provides details on its use.
Job Submission
Jobs can be monitored, created, edited, and submitted through the Job Composer tool or through the Interactive Applications on Open on Demand. OSC's Job Management help page provides more information on the use and features. This serves as a GUI alternative to SLURM scheduler commands.
You can monitor your jobs by going to Jobs > Active Jobs. Here, you'll see a list of all active jobs on CHPC clusters. To narrow the list, you can filter for Your Jobs and select a specific cluster.
Job Composer
Open OnDemand provides a Job Composer tool to help you write and submit SLURM batch scripts. To access it, click Jobs > Job Composer.
-
Templates: Choose a pre-defined template from the From Default Template drop-down menu to quickly set up a job for your chosen cluster and resource needs. We also have a variety of specific templates for certain software packages in the From Template menu.
-
Custom Scripts: If you have previously written your own SLURM scripts, you can use them as a template by selecting either From Specified Path or From Selected Job.
-
Need a Template? If you need a template for a package that isn't listed, please contact us at helpdesk@chpc.utah.edu.
Jobs can be submitted, stopped, and scripts deleted with the available Submit, Stop, and Delete buttons.
Interactive Applications
The Interactive Apps menu lets you launch specific graphical user interface (GUI) applications directly on CHPC compute nodes or Frisco nodes.
-
On clusters, these apps run as a scheduled SLURM job. This means they are allocated their own unique resources on a compute node, just like a job submitted from the command line.
-
On Frisco nodes, a new remote desktop login session is created for your application. This session is subject to the same resource limits as other login sessions.
The supported applications as of August 2025 include:
IDES
- Ansys Electronics Desktop
- Ansys Workbench
- Abaqus
- COMSOL Multiphysics
- Cambridge Structural Database
- GPT4AII LLM UI
- IDL
- LibreOffice
- Lumerical DEVICE Suite
- MATLAB
- Mathematica
- QGIS
- RELION
- SAS
- Stata
- Visual Studio Code
Servers
- Jupyter
- Nvidia Inference Microservice
- Protein Binder Design Jupyter
- R Shiney App
- RStudio Server
- Spark Jupyter
- VSCode Server
- vLLM Microservice
Visualization
- Coot
- IDV
- Meshroom
- Paraview
- VMD
Other applications may be requested viahelpdesk@chpc.utah.edu.
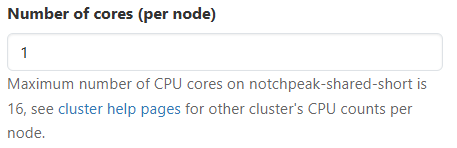
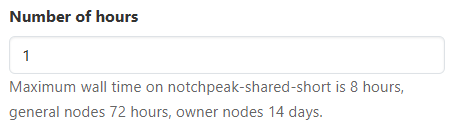
When using interactive applications in the general environment, all jobs are submitted
by default to the notchpeak-shared-short cluster partition. This partition is designed for interactive use and has a default
limit of 16 CPU cores and an 8-hour wall time per job. While this is the default,
you can request any other cluster partition/allocation or Frisco node, with a few
exceptions noted on the individual app's form page.
For the protected environment, the redwood-shared-shortaccount and partition are used as the default, with a maximum of 8 CPU cores and an
8-hour wall time.
Most interactive applications share a similar form and input fields, making it easy to navigate and submit jobs.
Additional Features
-
View-Only Links: If supported, you can share a read-only link to your session with colleagues who also have access to the Open OnDemand portal.
-
SSH Access: To open a terminal session to the compute node, click on the blue host name box.
Troubleshooting
If you encounter an issue, please provide us with the Session ID. This is a link to the directory containing your job session files and will help us quickly identify and troubleshoot the problem. If you click 'Problems with this session?', it will automatically generate a message to the CHPC with your problem and Session ID included.
Required Input Options
There are several required inputs, Cluster, Account and Partition, Number of cores (per node), and Number of hours. Certain applications also include Program version and a few specific inputs. Below are the descriptions of these required inputs:


| Try using our tool that helps users find which accounts, partitions and qualities of service you can use when submitting jobs on Center for High Performance Computing systems. |
Advanced Input Options
Advanced options are listed after checking the Advanced options checkbox. If one of the advanced options has a non-default value, the form will not allow hiding of the advanced options. If you want to hide the advanced options, make sure to remove the value or set the value to default. The advanced options include:


Running an Interactive Session
After selecting your job options, click the Launch button to start the session. A new window called My Interactive Sessions will open, showing that your job is being staged.
Your job will initially sit in a queue while Slurm assigns the appropriate compute resouces to your job. Once the job is ready to begin, the window will update with a Launch Session button. Click this to open a new browser tab with your application running on the compute node. Remember, closing this browser tab will not end your session; it will continue to run until its specified time limit (walltime) is reached. To end a session early, simply click the red Delete button.
The image below shows an example of a job that is ready to launch.

Information shown with your submitted job includes:
- Host: Shows the node your job is running on.
- Created at: Shows the time when the job was created.
- Time Remaining: The time that the interactive session has left to run.
- Session ID: Clicking on the session ID link takes you to the files in your directory for your job session.
- Problems with this session?: Clicking on the link will take you to a page where you can submit a ticket if any issues occur.
Access & Job Management
Shell Access
The Clusters drop-down menu at the top provides links for shell access to all CHPC clusters via interactive nodes. The shell terminal is opened in a new tab in your web browser.
Clusters available for shell access on Open Ondemand are:
- Kingspeak
- Lonepeak
- Notchpeak
- Granite
- frisco1
- frisco2
- frisco3
- frisco4
- frisco5
- frisco6
- frisco7
- frisco8
Job Monitoring
CHPC is transitioning its job metrics reporting platform. We are currently phasing out XDMoD as the primary tool for detailed insights into job metrics and resource utilization.
We have activated Portal to provide users with enhanced resource and utilization reporting capabilities.
These features will be available on Open Ondemand soon through portal.
Cluster Status
To access information on all CHPC clusters , in Open Ondemands homepage the system installed app called Cluster Status shows all cluster nodes that are running or queued.
This is a good resource to finding how which nodes are available for your job.
Things to Note
Jupyter Notebook:
- When using Jupyter Notebook on CHPC, you can leverage your own Miniforge environments. This is the recommended alternative to Miniconda, as it defaults to
the community-driven
conda-forgechannel, providing a more up-to-date and open-source package management experience. - Within the Jupyter Notebook application, you can use different kernels to execute code in various languages, such as Python and R. You can also create and manage your own environments to install specific packages and dependencies for your projects.
RStudio:
- For technical reasons, RShiny App does not currently work on the Frisco nodes. You will need to use a cluster partition for those jobs.
- For technical reasons, CHPC builds of the RStudio Server only work on the frisco nodes. You will need to use a cluster partition for those jobs.
- Interactive sessions on compute nodes, including those for RStudio, do not have direct internet access. If you need to install new packages or download files, you must do so from a login node or visualization node.